Monday, June 23, 2014

Quick, Homemade Marinara, Roasted Veggies and Farro

I love marinara sauce.  My pasta, pizza, and eggplant parmesan usually have more sauce than anything else. When I received the news how good lycopene is for us and how it's nutritionally better when the tomatoes are cooked, I became an even bigger marinara fan; lay it on and lay it on thick!

When we started growing tomatoes in the garden, I had the great idea of making my own pasta sauce. I painstakingly peeled, seeded and cooked-down the tomatoes. I thought it was going to be heavenly, but it was not.  Compared to the jars of pasta I was pulling off of the grocery store shelf, it was bland and tasteless. I didn't make my own sauce for years after that episode but eventually I realized my disappointing sauce lacked the tablespoons of sugar and salt the commercial jars contained. Fast forward a "few" years, and here I am in my "abhorrence of anything salty" stage, and my DIY kitchen movement, and I wasn't even making my own marinara. I rectified that with a recipe of marinara made with canned tomatoes in a slow cooker. It was darn good and a helluva a lot better than what I could buy in the store.  To be honest, the DIY came about from needing more control of what goes into my food.  Most everything made outside of my kitchen is too salty, too over-cooked(veggies)and just not as good as what I can make. The marinara is another example of this. I seek out the tastiest, healthiest, organic canned tomatoes along with other organic ingredients, and I have pasta sauce or pizza sauce quickly available either by whipping up a batch or pulling extras out of the freezer. With a good marinara in your fridge or freezer, you'll have an array of options for dinner or lunch.


Chop large: 3 carrots and 1 large onion. Peel 6 cloves of garlic. 1 can 28 ozs of crushed tomatoes and 1.5 Tbls of olive oil. Throw the carrots, onions and garlic into the food processor and pulse until finely minced. Add oil to pressure cooker and heat on medium heat
Add the minced vegetables. Saute for four minutes. Add in the crushed tomatoes, mix and put on the pressure cooker lid.  Once it reaches pressure, cook for 45 minutes. 


Seriously, all it took was 15-20 minutes to prep and another 45 minutes to cook. Doesn't that look good?


Marinara Sauce


I pulled this out of  the Vegetarian Times, January/February 2013 issue. This is the marinara used in the microwaved Eggplant Parmesan recipe from the Mod Squad Cooking Lab. I made a double batch so do not use the photos as a guide.

Ingredients:
1 large yellow onion, cut into large dice(2 cups)
3 medium carrots, cut into medium dice(1 cup)
6 garlic cloves, peeled
1.5 Tbls of olive oil
1 28-oz can crushed tomatoes, such as San Marzano or other high quality tomatoes

Directions:
1) Place onion, carrots, and garlic in bowl of food processor; pulse until finely minced.
2) Heat oil in pressure cooker over medium heat. Add minced vegetable mixture, and saute 4 minutes or until translucent.
3) Stir in crushed tomatoes, close pressure cooker, and bring to 15 psi over medium-high heat. Cook sauce 45 minutes in pressure cooker.
4) Depressurize cooker, and season sauce with salt, pepper, and additional olive oil(optional).


Roasted Vegetables


Position the oven racks top and bottom and heat the oven to 400 degrees F.

Chop vegetables of choice like-sized and coat with olive oil and whatever other seasoning you prefer.
Place veggies on a jelly-roll pan, lined with aluminum foil and spayed with olive oil. Do not crowd and keep harder veggies on one pan and softer veggies on another.

Roast veggies for 10 minutes then switch racks and shake the pans a little. roast for another 7 to 10 minutes until preferred doneness.


Farro


A grain loved by Italians and often found in many Tuscan dishes. The texture is firm, nutty and very different.

1 cup dry Farro/medium
4 quarts water

Bring water to a boil and add the Farro.  Boil for 15-20 minutes.  This is the pasta cooking method and works very well with this grain.


Marinara and roasted veggies on a bed of Farro. 


Tuesday, June 17, 2014

I Brought Hummus!


It's what I offer to bring when I don't want to worry if there will be any vegetarian offerings.  And, may I add, a lack of vegetarian options happens quite often here in WI.  I often take the chance of my healthy but delicious hummus having only but one or two spoonfuls taken out while the sour cream with bacon dip dish  is licked clean. Oh well,  so is the life of a vegetarian stuck in the land of brats.

I may take a large amount of my hummus back home, but the other guests have no idea what they missed.  I make a spicy black bean hummus that tastes so good with a good quality tortilla chip, but it looks a little nasty. Or my favorite is black eyed pea hummus that is so creamy and rich, I eat it by the spoonfuls. One of the many reasons I love hummus is because of it's versatility: add any legume with tahini and you have a different hummus.

Why does my hummus taste so much better(yes, this is subjective) than the store-bought or your nearest deli?  Well, I am about to disclose my hummus making secrets to you.  So if you are a veg-head like me, or you are watching the calories you consume even at a party, follow my lead.  Surround the hummus with quality pita chips, chunks of pita bread, or vegetables, and you have yourself a delicious mini-meal in case your healthy or vegetarian/vegan options aren't looking too promising.


I make hummus from organic dried beans(1 cup dry equals 2 1/2 Cups cooked).  It's cost effective, and I control the sodium. Save yourself some time and soak the beans overnight or for eight hours. I soak them in filtered water in a large mixing bowl(don't forget the beans expand) and the picture above are the beans post-soak. For convenience or time constraints, use canned but remember to rinse well.


This is where the pressure cooker comes in handy.  Chickpeas that would normally take an hour to hour and a half simmering on the stove-top, get done in fourteen minutes with a pressure cooker. Once you do a natural release, strain the beans, but be sure to save a cup of the cooking liquid. Set aside beans and liquid to cool.


Okay, you can't use my pictures as a guide--I made a double recipe of hummus.  I always freeze the other recipe just in case I need hummus in a pinch.  Pull out the food processor and chop a clove of garlic.


Add the rest of the ingredients: 2.5 Cups chickpeas, 4 ozs roasted red peppers, 1.5 Tbls Tahini(ground sesame seeds), three Tbls lemon juice, 1 clove of garlic, 1/2 tsp ground cumin, 1/2 tsp cayenne pepper, 1/4 tsp salt.  Process for a minute, and here is where my secret comes in, slowly add a Tbls or two or three of the cooking liquid. Process until desired consistency and move the hummus to the fridge. While the hummus is chillin, work on the pita chips.


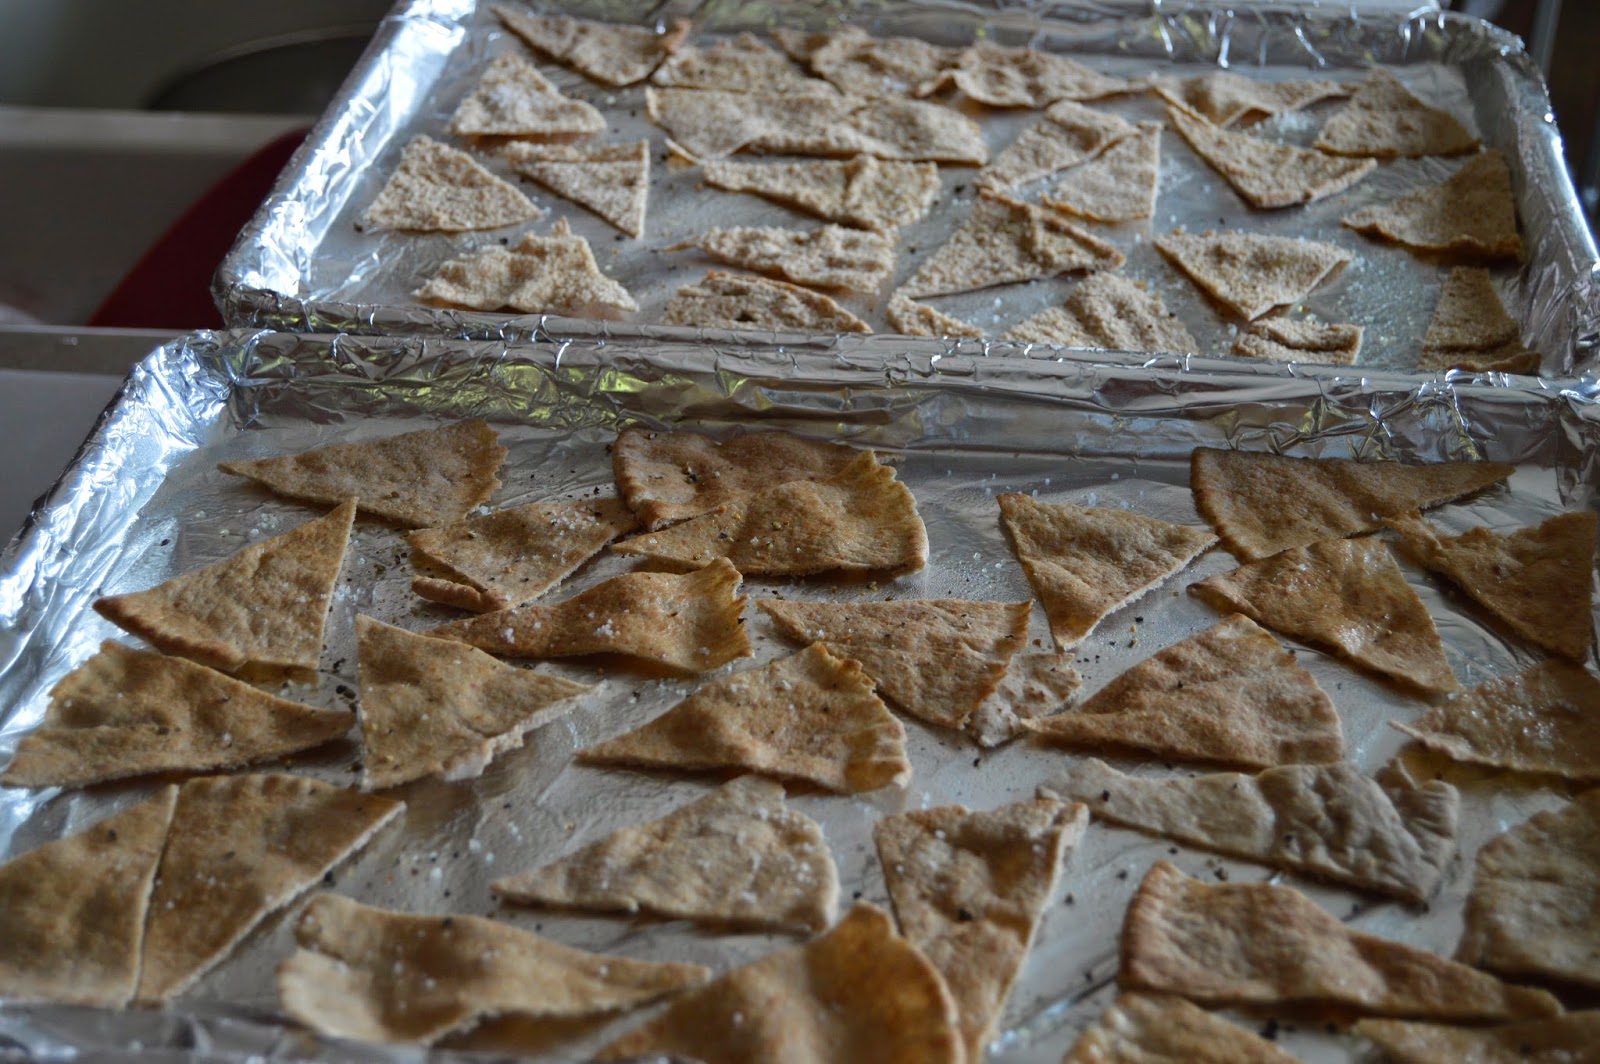
Buy a pack of good pita bread; this is whole wheat pita. Cut into eighths and separate the thin and thicker sides of the bread.


Spray a lined cookie sheet with olive oil and sprinkle with salt.  Lay the bread down in a single layer and spray and salt the top.  Add a few twists of ground pepper here.  Bake at 400 F for 6-8 minutes. Watch them closely--they burn fast.  Leave them on the cookie sheets until cool and crisp. Bake the thin sides first and the thicker in the next batch.  The thicker sides will need  a minute more.


Spicy Roasted Red Pepper Hummus


Ingredients

 1  Cup dry chickpeas, rinsed and soaked overnight. Or a 15 oz can of chickpeas(well-drained)
 1 4 oz jar of roasted peppers
 3 tablespoons lemon juice
 1 1/2 tablespoons tahini
 1 clove garlic
 1/2 teaspoon ground cumin
 1/2 teaspoon cayenne pepper
 1/4 teaspoon salt


Instructions
1.Add the soaked chickpeas to the pressure cooker with 8-10 Cups of water. Pressure cook for 12-14 minutes with a natural release.
2.In an electric blender or food processor, puree the chickpeas, red peppers, lemon juice, tahini, garlic, cumin, cayenne, and salt. Process, using long pulses, until the mixture is fairly smooth, and slightly fluffy. Make sure to scrape the mixture off the sides of the food processor or blender in between pulses. Transfer to a serving bowl and refrigerate for at least 1 hour. (The hummus can be made up to 3 days ahead and refrigerated. Return to room temperature before serving.)

Pita Chips


INGREDIENTS:

4-8 pita bread pockets
olive oil spray
salt 
pepper

DIRECTIONS:
1. Preheat oven to 400 degrees F (200 degrees C).
2. Cut each pita bread into 8 triangles. Place triangles on lined cookie sheet.
3.Spray pan and sprinkle with salt. Add bread to the pan and spray with olive oil. Sprinkle more salt and pepper on top.
4. Bake in the preheated oven for about 7 minutes, or until lightly browned and crispy. Watch carefully, as they tend to burn easily!


I brought hummus!


Sunday, June 1, 2014

It's Rhubarb Time!!

A pathetic looking perennial growing underneath our dryer vent(a duh moment when we planted it years and years ago), and now accessible to vacuums with feathers, it looks even worse than previous years. Rhubarb grows like a weed here in WI, and it is for this very reason, I refuse to pay for it.  Someone must have some stalks they would be grateful to part with. t Within three days, my father-in-law dropped off trimmed, gorgeous stalks of rhubarb weighing in around 5 lbs. I couldn't thank him enough.

Rhubarb is certainly a sign spring has sprung.  It was green and growing while there was still snow on the ground, so it's a very tough plant.  It's used like a fruit in pies and cobblers, but interestingly, it's a vegetable.
I can honestly say it's the only vegetable I add sugar to; one cup sugar for every 1.5 lbs of diced rhubarb(adjust the sugar if a sweet fruit is added). It reminds me of a cross between celery, because of the strands, and cranberries, due to the tartness and needing sugar. So if you are lucky enough, and a neighbor bestows you with a bunch of rhubarb, strip the stalks of their poisonous leaves, and cook or bake it  into something delicious! The simplicity of this "vegetable" is perfect for busy spring.


Dicing the 5 lbs of rhubarb. Yes, I'll be freezing some of the compote.


Diced stalks with sprinkled sugar. I used cane sugar so it's a little brown.

The rhubarb cooked down.


Some of my fresh yogurt, rhubarb compote, and dark chocolate.  I am seeing adding this to waffles, pancakes, biscuits, and sponge cake.


Rhubarb Compote


Ingredients:

-1.5 to 1.75 lbs of rhubarb, cleaned and diced to 3/4 inch pieces(about six cups).
-1 cup sugar

Instructions:

Trim ends of stalks and cut into 3/4 inch pieces. Peel away any tough skins.  Stir together rhubarb and sugar in a large saucepan (off heat); let stand until rhubarb releases some liquid, about 10-20 minutes.

Bring rhubarb mixture to a boil over medium-high heat, stirring occasionally. Reduce heat; simmer, stirring occasionally, until rhubarb has broken down but some whole pieces remain, about 5 minutes. Remove from heat.

Cool thoroughly.