Sunday, March 23, 2014

Homemade Whole-Grain Mustard

I'm German...Austrian or something.  I recently found out, after many years of labeling my heritage as German, my ancestors actually hailed from Austria and Luxembourg.  It makes sense since after visiting both Germany and Austria, I resemble more like the Austrian peoples performing at the Mai Fest in Salzburg.
Mai Fest celebration in Salzburg

A delicious meal enjoyed at the Augustiner keller in Salzburg
Ok, so I am indeed Austrian and Irish instead of German and Irish. Let's just forget the fact that Hitler came from Austria...forgotten. Whatever I am, I love mustard.  I learned two(three)words in German while in Bavaria and they are: bretzeln, senf and spargel. Translated it is: pretzels, mustard and white asparagus. The pretzel and mustard was my go-to food in Bavaria.  Not a lot of choices sometimes for a vegetarian.  Trust me, I never went hungry; the food and the beer were always delicious. Oh, and I learned the German word word for asparagus because it was in season and all of the biergartens featured it.  

Making my own mustard never crossed my mind until I read Cook's Illustrated DIY cookbook.   I was paging through it, and I stopped at the Stone Ground Mustard recipe.  It was so insanely simple; I wondered why I hadn't done this years ago.  It has a bold taste and a texture required from my mustards.


Making Whole-Grain Mustard


Combine the apple cider vinegar, yellow mustard seeds, brown mustard seeds, and beer. Stir and cover with plastic wrap. Leave at room temperature for up to two days.
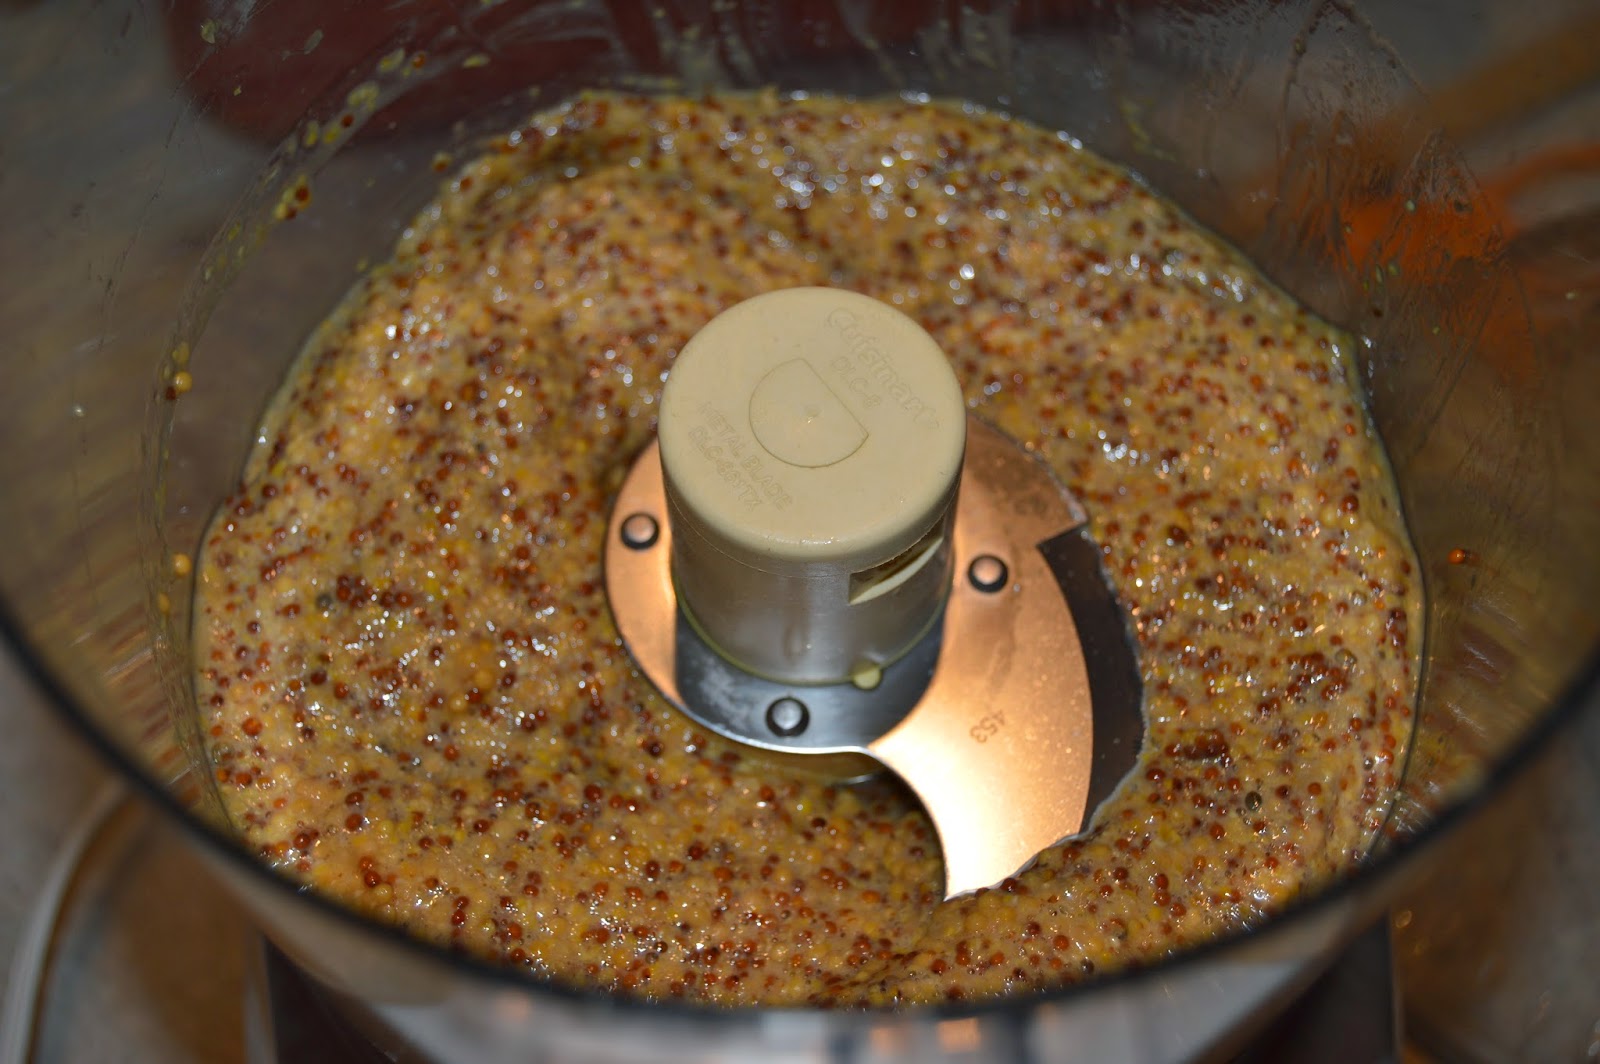

After leaving at room temperature for the desired amount of time, pour the seed mixture into a food processor. Add salt and brown sugar and process for one minute. Transfer mustard to jar and leave sit at room temperature for 1 to 2 days.  This is where the heat of the mustard is decided so do the 1 day if you like it mild.

Here is the finished mustard with some of my homemade pretzel bites(may be a future blog item after a little tweaking).

Recipe for Whole Grain Mustard

Ingredients
1/2 cup cider vinegar
1/4 cup yellow mustard seeds
1/4 cup brown mustard seeds
1/4 cup beer
2 teaspoons packed light brown sugar
3/4 teaspoon salt

Instructions
1) Combine vinegar, mustard seeds, and beer in medium bowl. Cover with plastic wrap and let stand at room temperature for at least 8 hours or up to 2 days.
2) Process soaked mustard seeds with sugar and salt in food processor until coarsely ground and thickened, about 1 minute, scraping down bowl as needed.
3) Transfer mustard to jar with tight-fitting lid and let stand at room temperature until it achieves desired spiciness, 1 to 2 days. Transfer to refrigerator. Mustard can be refrigerated for up to 3 months.

Ok, while this mustard is a breeze to make, dijon--not so much.  I have tried two different recipes and both turned out extremely bitter. If you know of a fail-proof dijon recipe, please share it. 

Thursday, March 13, 2014

Happy St. Patrick's Day-Let's bake some bread

I wanted to publish an entry in celebration of St. Patrick's Day coming up soon.  I'm a little Irish but not enough Irish to have grown up with recipes handed down from my mother or grandmother.  I can't remember my mother cooking or baking anything remotely Irish except for maybe boiled potatoes.  I've scoured my cookbooks looking for a recipe resembling Irish fare, and I came up empty handed.  I found some cookies made with whiskey but that's as close as I came. When I voiced my aggravation out-loud, my husband quickly suggested a bread his mother had made for him.  He was so anxious for me to make it, he forwarded a recipe from the internet to me. Ok, dear, I got the hint. Sometimes it takes a pan to fall off its hook and hit me on head to make something obvious, and this is a perfect example.

Whenever I am unfamiliar with a dish, I consult Cook's Illustrated for a little direction. And of course, they did not disappoint. I have never had Irish Soda Bread, so I have really no idea what's good and what is traditional, but after testing this recipe, I'm not sure I care.  So much quicker than a bread with yeast, and the taste was of a hearty wheat; crisp on the inside and moist on the inside. With so few ingredients, I never thought this bread was going to have the complexity of taste I require but here it is.

So the bread takes an hour to make(including baking time), and it tastes great; I guess this means I won't be baking this bread just for St. Patrick's Day.

Brown Irish Soda Bread


In a large mixing bowl combine: all-purpose flour, whole wheat flour, cake flour, wheat germ(I used ground flax instead), cream of tartar, baking soda, salt and sugar.

Incorporate the butter into the flour mixture--I used my hands for the heat to help work in the butter.  Make a well in the middle and pour in the buttermilk.  Work the flour and buttermilk(important to use buttermilk and not just regular milk) until fully incorporated. Cook's recommends a cup and a half of buttermilk, but I added a quarter cup more due to the dryness.


Form into a round loaf and add to the cast iron skillet. Take a sharp knife and cut a shallow "X" on the top(Irish did this to ward of the devil and protect the household).  Bake in a 400 degree oven for 40-45 minutes.

    The bread right out of the oven and drizzled with butter.


   Here's my dinner: sliced Irish Soda Bread with tapenadeTapenade Blog Entry and eggs from my girls. 


The recipe below is taken from  Cooks Illustrated.

Brown Irish Soda Bread

MAKES 1 LOAF

If you do not have a cast iron pan the bread can be baked on a baking sheet although the crust won’t be quite as crunchy. Soda bread is best eaten on the day it is baked but does keep well covered and stored at room temperature for a couple of days after which time it will become dry.

INGREDIENTS

  • 1 1/2cups all-purpose flour
  • 1/2cup cake flour
  • 1 1/2cups whole-wheat flour
  • 1/2cup toasted wheat germ
  • 1 1/2teaspoons cream of tartar
  • 1 1/2teaspoons baking soda
  • 1 1/2teaspoons salt
  • 3tablespoons sugar
  • 2tablespoons unsalted butter, softened
  • 1 1/2cups low-fat buttermilk
  • 1tablespoon melted butter, optional

INSTRUCTIONS

  1. 1. Heat the oven to 400 degrees and adjust a rack to the center position. Place the flours, wheat germ, cream of tartar, soda, salt, and sugar in a large mixing bowl. Add the butter and rub it into the flour using your fingers until it is completely incorporated and the mixture resembles coarse crumbs. Make a well in the center and add the buttermilk. Work the liquid into the flour mixture using a fork until the dough comes together in large clumps. Turn the dough onto a work surface and knead briefly until the loose flour is just moistened. The dough will be sticky and you may add a small amount of flour as you knead. The dough will still be scrappy and uneven.
    2. Form the dough into a round about 6 to 7 inches in diameter and place in a cast iron skillet. Score a deep cross on top of the loaf and place in the heated oven. Bake until nicely browned and a tester comes out clean when inserted into the center of the loaf, about 40 to 45 minutes. Remove from oven and brush with a tablespoon of melted butter if desired. Cool for at least 30 minutes before slicing. Serve slightly warm or at room temperature.

Saturday, March 8, 2014

Choco-Nut Oat Bars

Many, many years ago, when I had first moved out with my then boyfriend and now husband, I had the grand scheme of baking Christmas cookies.  I recruited a gal I worked with at the time to help me.  She was none too happy when she witnessed my scantily-clad-closet for a kitchen. I had no mixing bowls, measuring spoons, or even a gas oven with a working pilot light . I don't recall what we baked, or if we were able to successfully bake even a batch of anything, but what did get ignited was my love for a certain cookie book.

The cause of my cookie escapade started with buying a recipe book from the grocery store. I was the ripe-old age of 20, and my first cookbook was about cookies.  This all makes sense given who I am now--a self-proclaimed cookie connoisseur. Those little disks of deliciousness call to me; especially if it has peanut butter and chocolate or any combination of chocolate and nuts. The mood will just hit, and I will pull out the necessary baking ingredients and whip up a batch or two. What's not to love about cookies? They are easy to taste-test compared to a cake or pie and also extremely portable. I've made a pact with myself: I can only indulge in cookies if I have made them; no store-bought cookies.  The exception of course is girl scout cookies--I'm only human. The cookbook is simply called, Cookies  by Natalie Hartanov Haughton . I've used it to death since buying it in 1984, so I transferred the cookbook to a binder with plastic protectors.  It's my go-to book when I'm looking to make a cookie or a bar.  But the one recipe I have made(and the stained, wrinkled page proves it)time and time again is a cookie creation called, Choco-Nut Oat Bars.  I have made those bars for countless bake sales, birthdays, and thank you gifts.  They whip up fast, and somehow I always have the ingredients on hand. I cannot stress how easily these come together; and the added bonus, they are delicious and flavorful.


I start out by roasting the nuts for 5-10 minutes on medium heat, stirring frequently. No burning the nuts-yuck.  After they have cooled, chop them.


Chop the unsweetened chocolate. Tip: If you chop nuts or chocolate on wax paper on your cutting board, you can just pick up the wax paper to transport the chopped item to the bowl.

Add the sweetened condensed milk to unsweetened chocolate and microwave on high for 30 seconds. Stir briskly.  Place back in microwave and repeat process.  It should just take a minute and a half or so to melt the chocolate completely.


Add the chopped nuts to chocolate mixture and stir to mix.  Set aside.


Throw 2 cups of flour, a half teaspoon of baking soda and a quarter teaspoon of salt into the flour. Set aside.

Blend 1 cup butter with a cup and a quarter of packed brown sugar. Add two teaspoons of vanilla extract and beat.

Add the flower mixture and combine. Add two and a half cups of old-fashioned oats and blend completely.


Take one half of dough mixture and add to a greased 13x9 pan(don't go up the sides of the pan--you want a sandwich look). Add chocolate mixture(microwave for another 15-25 seconds if too stiff)and carefully spread evenly.  Pat remaining dough to chocolate layer. Bake for 25-30 minutes at 375F.


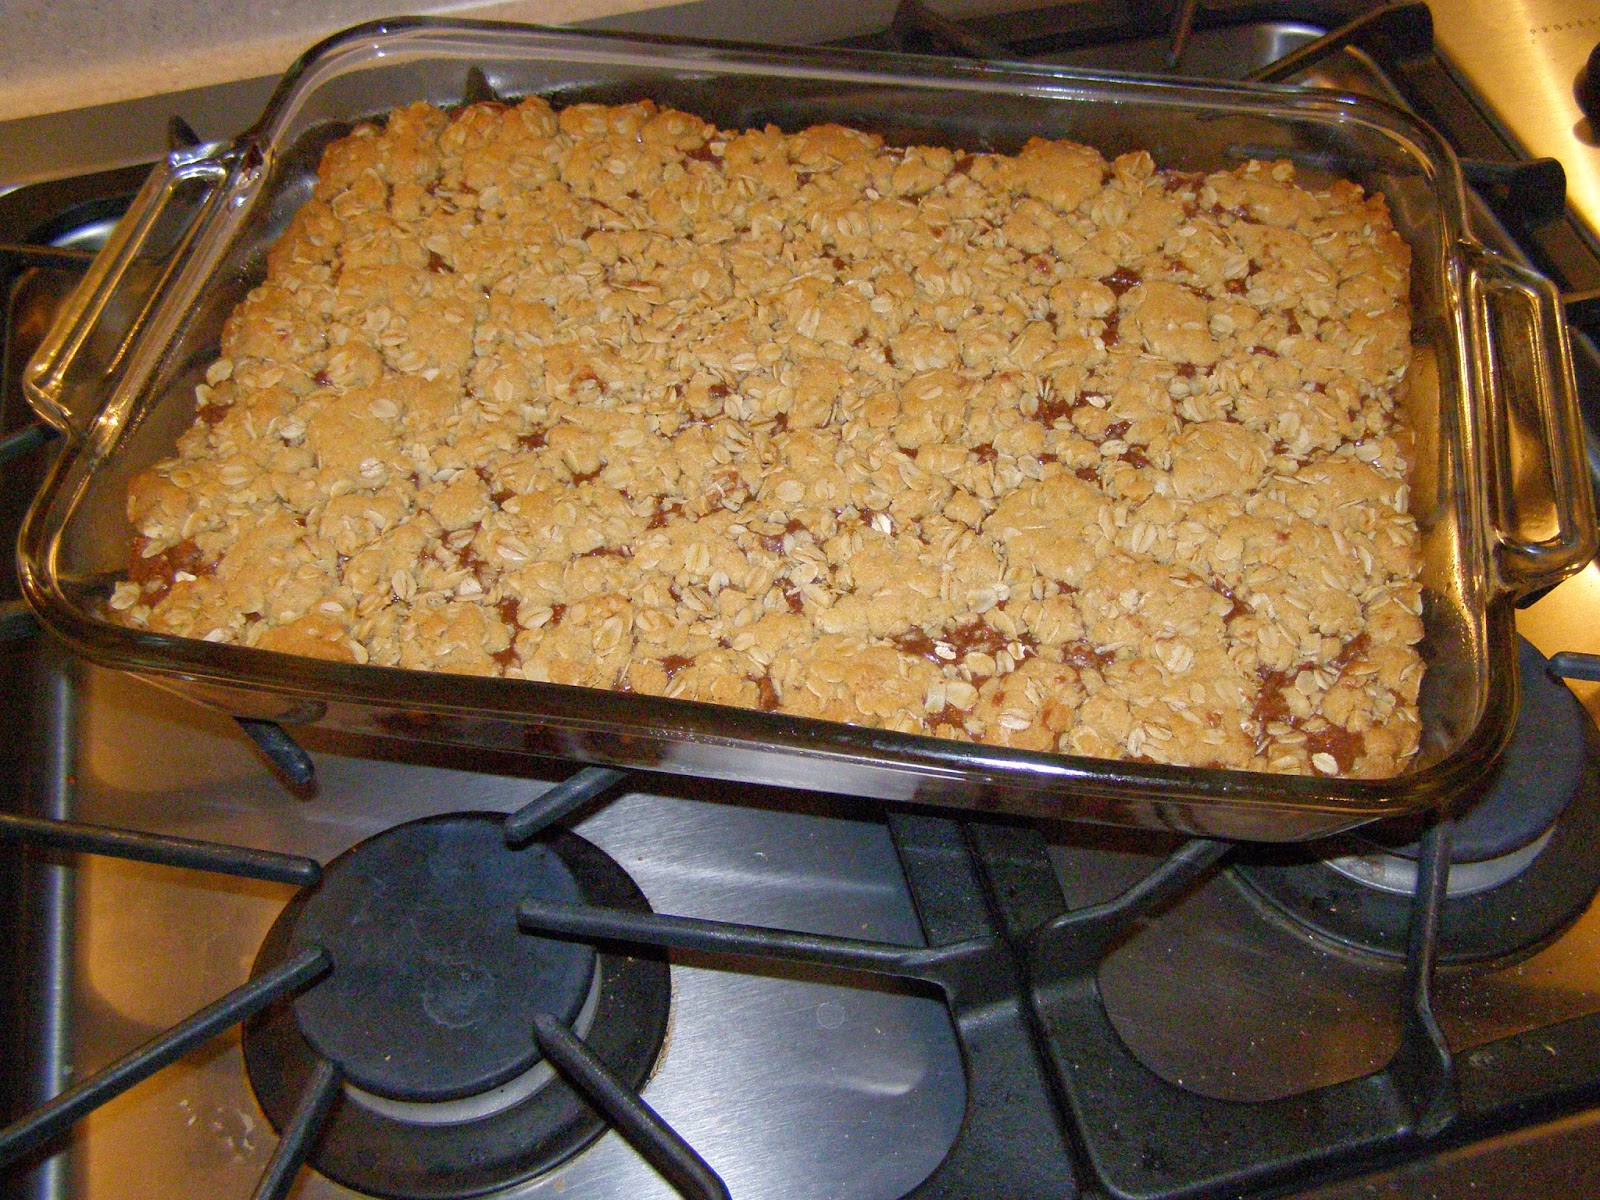
Isn't that pretty? Let cool completely in pan and then cut into bars.


Choco-Nut Oat Bars

Ingredients:
1(14-oz) can sweetened condensed milk
2 oz unsweetened chocolate-chopped
1-1/2 chopped nuts(I roast the nuts before chopping)
1 cup butter, room temperature
1-1/4 cup packed brown sugar
2 teaspoons of vanilla extract
2 cups all-purpose flour
1/4 teaspoon salt
1/2 teaspoon baking soda
2-1/2 cups old-fashioned rolled oats

Directions:
Preheat oven to 375F. Grease a 13 x 9 baking pan.  *In top of a double boiler, combine sweetened condensed milk and chocolate. Heat over hot but not boiling water until melted and smooth, stirring constantly. Remove from heat. Stir in nuts; and set aside. In a medium bowl, beat together butter, brown sugar and vanilla until light and fluffy. Add flour, salt, and baking soda, blending thoroughly. Stir in oats, mixing until crumbly. Press half of oat mixture evenly in bottom of greased baking pan. Spread evenly with chocolate-nut mixture. Sprinkle with remaining oat mixture, pressing into chocolate. Bake 25-30 minutes or until golden brown. Cool in pan. Cut cooled cookies into bars. Makes 54.

*You can also cook the chocolate and sweetened condensed milk in the microwave.  Microwave on high for 30 seconds in a microwave safe bowl and stir. Microwave for another 30 seconds and stir again.  You may need another 15 seconds or so, depending how fine you chopped the chocolate. Be careful--chocolate burns easily.

Monday, February 24, 2014

Me an' my sprouts

So many health scares surrounding these healthful powerhouses. Don't be afraid: every vegetable we consume raw always holds a risk of salmonella or E coli. Sprouts have a leg-up on this due to the seeds soaking in water.  I've been making my own sprouts on and off for the last ten years, and I can confidently say, the sprouts have never been a source of illness for me. I use organic seeds, filtered water, and I religiously water and drain two or three times a day.  Use your nose: If it doesn't smell right, throw it away. Another level of safety I've adopted is, once the seeds have germinated and grown, I harvest the sprouts and soak them in filtered water for five minutes.  This cleans and eliminates the seed casing which can make the sprout bitter. This last step makes for tastier sprouts too.

Since I started off this entry with the bad let's move on to the good.  Sprouts are nutritious vegetables packed with B, C, E and A vitamins(up to 15 times the original content).  They are easier to digest and offer natural enzymes we don't often get with their mature cousins.  Don't think of them just for salad--they add an extra layer of crunch to hot food as well as cold. Throw them in soups, smoothies, sandwiches or just munch on them.  You don't need special equipment to grow them; a jar with a muslin or cheesecloth cover will do the trick.  You need need seeds and water and a little dedication-that's it.  I prefer a sprout starter, and to prove it, I'm on my third one, the Victorio VKP1014 4-Tray Kitchen Seed Sprouter. You water the first tray and the water runs down holes to the outer perimeter of the first tray to all of the trays below. The only caveat is you have to tip the trays a little to remove excess water.  A great idea I read was to tip all of the trays like the leaning tower of pisa. They drain and receive a little air at the same time.  


How pretty are those green sprouts! I did here what I swear never to do; I didn't space out the growing-time.  I recommend doing a tray every other day or so.  It takes about 5-7 days for the sprouts to get this mature so plan ahead.  If you alternate days for starting seeds, you won't end up with a large harvest like this.  Good thing the chickens like sprouts.

I'm cleaning the sprouts and separating them from the seed.  Just throw them in the water and swish around a bit.  The casings will stay behind in the water.  Dry the sprouts the best you can before storage and clean the trays with soap and water before starting a new crop. 


I've harvested all four trays and now I'm starting over.  I have one tray of chick peas and another of a salad blend. The bigger seeds you will add 2-3 tablespoons and just a teaspoon or so of the small seeds. Don't crowd the tray with seeds.  I've purchased organic seeds from Amazon and another good source is The Sprout House.  I found them just recently, and I was impressed with their sample packs and the quick shipping.


To start the growing process, just add water.  They recommend soaking the seeds for quicker germination, but I skip this step. I add water to the first tray and it leaks down to the rest until the water is deposited in the bottom tray.  The bottom is hole-free and is for collecting of water only--no growing sprouts in this.  Be sure and alternate the position of your trays. The next time I water, I will move the salad blend to the top and the chick peas to the bottom.  The bottom seed tray always seems to retain the most water so it's important to alternate them.  Water them at least twice a day, and you will have sprouts in 5-7 days.  Pretty easy, wouldn't you say?  Excuse me while I dig-in to my hefty sprout harvest and throw some on the black bean burger I am having for dinner tonight.


Saturday, February 15, 2014

For the love of yogurt

In the 70's, my very progressive and health conscious mother, made her own yogurt. She would serve it as dessert in little dishes with fresh fruit.  I did not like it. And I was not happy my mother was serving this cooked milk thing and masquerading it as a dessert.  The yogurt we purchased in the stores in the 70's and beyond was the furthest thing from healthy; from the artificial colors and fruit flavoring and the gelatinous mess the market tried to pass off as yogurt did not endear me to the food anymore than my mothers' creation.  I didn't eat yogurt for years until the last decade or so.

I'm not sure how I graduated from buying organic yogurt from my co-op to making my own, but thanks to Amazon's order history, I started making it six years ago. So, since May of 2009, I have made countless batches of delicious, organic yogurt. While it's tart compared to what Americans are used to, you can counteract that by adding granola, fresh strawberries and sprinkles of dark chocolate. Now it's tasty enough to make even me a yogurt fan.

Here are a few items you will need to make your own yogurt: milk, yogurt culture, a glass jar and a source for  low heat(110° to 115°).  This is the minimal you will need.  To make my recipe, you will also need organic, powdered milk, vanilla bean(optional), and a thermometer.

Let's talk about the most important ingredient, milk. I was under the belief raw milk would make the best yogurt. While it does make great tasting yogurt, it's awfully runny.  I was really baffled when I cultured my first gallon of raw milk, and it turned out to look more like kefir than yogurt.  I did an exhaustive research on the internet and learned raw milk behaves like this; it doesn't want to solidify without a thickening agent like gelatin. Hello, I'm a vegetarian, any other ideas? I experimented with this and that, and I learned quickly my methods for making yogurt from pasteurized milk worked on the raw milk as well.  Raw milk just yields a thinner consistency. That's alright, I can get past this: Greek yogurt anybody?  I could not understand why the yogurt was so thin for this full-fat milk.  I learned from the wonderful internet, pasteurization damages the proteins in the milk so the culturing is more effective and produces a thicker yogurt. Before I started getting raw milk, I was using an organic 2% ultra-pasteurized milk.  It worked great for texture, and if you aren't interested in raw milk, it made a pretty tasty yogurt too albeit tart.

The second necessary item is the culture.  You don't necessarily have to buy a package of starter for your first batch.  You can always use a half a cup from your favorite yogurt.  I have never done this for fear of the unknown.  A failed batch of yogurt can be a costly affair when you are talking about organic milk and organic powdered milk, so I try to make it as fail-safe as possible. I like Yogourmet Freeze-Dried Yogurt Starter.  I use a new culture packet for every quart of yogurt.  Cultures for Health has several different cultures and one packet will make up to two quarts of yogurt.

Making Yogurt

 This photo shows what you need to make your yogurt. Two quarts of milk, yogurt culture, powdered milk, whisk, and a thermometer.
My two yogurt makers: the first has seven-6 oz jars for yogurt and the other makes large batches in a water bath.  Between the two--I loved my Euro-Cuisine YM100 Automatic Yogurt Maker.  I rarely had a bad batch in the Euro-Cuisine, and I loved the pre-measured jars.  I would just throw them in the dishwasher for clean-up. I can tell you this, the small the amount of yogurt the more likely for success. Feel free to start out making a quart with the first couple of batches.

I have heated the milk in the microwave to 110° to 112°.  You do not want it much hotter or cooler.  We want to make it starter friendly. Here I have heated up the milk and now I am adding the powdered milk  Five to six tablespoons for two quarts of milk. This is a quicker method for yogurt because the powdered milk allows me to skip bringing the milk to high heat and then cooling to the 110°. I have not the time nor the patience to deal with that; besides, I do not want to "cook" the raw milk and kill all that is good about it. I whisk the powdered milk until all the lumps are gone, and flick some vanilla bean seeds into it(not shown). Very gently add the starter and stir.

Since I started getting the raw milk, I've been making larger quantities of yogurt.  Here I have about 160 ozs.of milk, and I am culturing it in my dehydrator. With it being such a large quantity, I set it at 115 for 24 hours. If I am using one of my culturing appliances, I set it for twelve hours plus. Directions say you should have yogurt within 4 hours, but I want to make sure my yogurt is set. Whatever you choose for the heat, it needs to be consistent and free from drafts.

Here is the yogurt after culturing undisturbed for 24 hours and then refrigerated for 12 hours. The yogurt must be chilled after it is through culturing.  It is not a complete process until it is thoroughly cooled.  You can consume the yogurt here, or if you want a more solid consistency, continue to the steps below.

Making Greek Yogurt


Remember when I told you the raw milk produced runny yogurt? I combat that with making Greek yogurt. I take the chilled yogurt and scoop it into this container, Cuisipro Donvier Yogurt Cheese Maker, or any container for straining.  You can also use cheesecloth or a very fine sieve. After you find a container to strain it, place it in the fridge for 4-6 more hours.  It really depends on how you like it.  I like my yogurt to contain some whey, so I don't leave it strain too long.

 Pictured here is most of the yogurt I made(minus 12 ounces I've already eaten).  The first time I strained the yogurt like this, I was aghast at the waste. You take out the whey and the volume of yogurt is drastically reduced.  Oh, so this is why Greek yogurt costs so much more.  To the right of the yogurt is some of the whey but not even close to all of the whey I collected.  I use it in bread recipes and water my plants and sprouts.  It's a great source of protein, so I try not to waste it.  To give you an idea of how much yogurt I yielded after culturing 160 ozs. of milk, I had about a total of 72 ozs. of yogurt post straining. Trust me, none of this yogurt will go to waste.
Here is the finished product with granola and dark chocolate chips.

Maybe if my mother had dressed up her yogurt like this, I would have loved yogurt a long time ago.


Tuesday, February 11, 2014

Smitten with Cookbooks of Old

Beth, a co-worker of mine, is a woman who sees the beauty in the most simplistic items of everyday life. She and her sister frequent estate sales and find those hidden treasures buried in hoarder-like mountains of...stuff. I made some dessert bars for someone's birthday and as a thank you for another co-worker.  Beth enthusiastically gushed about how good the bars were and how I "do" it.  She started telling me about all of the old cookbooks she has collected, but she only reads them; paralyzed from doing the actual cooking or baking. Beth promised me she would bring in some of her finds.  Good to her word, she brought me a large bag, busting at the seams, of old cookbooks dating back to 1907. I couldn't wait to dig in and peruse these old treasures. I gently opened each cookbook, and turned the pages so carefully as to not add a tear or a rip. Inside are poems, personal notes, names of individuals I never knew and recipes so short and succinct, I could quickly read through each and every recipe. Some pages are speckled and stained with butter, oil or chocolate, or little notes, "not good-too heavy."  All of this makes them all the more special(note to self: When I smear my recipe with sticky fingers, it will add personality to the recipe/cookbook).  After perusing the old cookbooks looking for a good recipe I could try, I notice why recipes are such short entries: No baking directions. Gulp, this leaves a large-margin for error. Here is an example from The Daniel Webster Flour Cookbook:

Mock Cherry Pie
One cup of cranberries cut open , half a cup of raisins cut fine, one cup of sugar, small cup of water(?), one tablespoon of Daniel Webster flour, one teaspoon of vanilla. Bits of butter may be added. Bake with two crusts.

Err, where's the rest of the recipe?  I looked at the page before and after to see if there was a master recipe somewhere. Nope. If you didn't have a mother who included you in her baking chores, your first couple of pies were epic fails.


I chuckle at some of the titles and notes with my 21st century-bias:  The Settlement Cookbook, Mrs. Simon Kander, second printing 1946, lists on the cover, "The way to a man's heart."  Oh, is that why I cook? Another book was titled, Food Preparation Meal Serving and Housewifery, Authorized by Board of School Directors; Milwaukee Public Schools. Housewifery isn't recognized by spell check--thank goodness.

I especially love the literary references and poems in some of the cookbooks. This poem is from the Book of Recipes, Ladies' Aid Society of The First English Ev. Lutheran Church of Detroit, MI, 1920. The author, Meredith.

We may live without poetry, music and art;
We may live without conscience , and live without heart;
We may live without friends, and live without books;
But civilized man cannot live without cooks.

He may live without books--what is knowledge but grieving?
He may live without hope--what is hope but deceiving?
He may live without love--what is passion but pining?
But where is the man that can live without dining?

Thank you, Meredith.


This recipe is taken out of The Daniel Webster Flour Cookbook, copyright 1907...sort of. It's actually a recipe written in  the cookbook by it's owner, Virginia Louise Schaefer.

Pour boiling water over prunes(10 ozs of prunes)and let sit till plump(2-8 hours). When you drain the prunes, do not forget to collect some of the liquid for the frosting. 

Drain the prunes and chop.


Mix the butter, sugar and prunes

Add the dry ingredients.

This is after the milk addition--crazy moist, and I didn't think it would ever bake through. I thought by spreading it out in a 8x8 pan would quicken the baking time as well as increasing the temperature to 350 F. Not so much--it still took an hour. 
Looks good. I waited until just a bit of batter showed on my toothpick before I took it out of the oven.

Prune Cake
This prune cake (is)somewhat like a fruitcake in texture; it has a finely blended flavor, and is moist enough to keep well.

Cake Ingredients
1/2 cup shortening(I used a stick of unsalted butter instead)
1 cup sugar
1 cup chopped, cooked prunes(Pour boiling water over prunes and let sit for 2 hours or more)
2 cups sifted, cake flour(I did not sift)
1 tsp baking soda
1/4 tsp salt
1 tsp cinnamon
1/2 tsp cloves
1/2 tsp nutmeg
2 1/4 cups milk
1 tsp vanilla

Frosting Ingredients
3 tbls butter(Two tbls)
1/4 cup prune juice(I used the liquid from the plumping prunes)
1 tsp vanilla
1/2 tsp lemon extract(a squirt of a lemon)
2 tbls chopped prunes
1/2 cup chopped nuts
4 cups sifted confection sugar(I used two cups)

Cake Instructions
Cream shortening and sugar thoroughly; stir in prunes. Mix and sift dry ingredients and add to previous mixture. Slowly add milk and vanilla. Beat for two minutes.  Pour into shallow loaf pan(I used a 8x8 pan instead), greased and lined with wax paper.  Bake at 325 for 1 1/4 hours(I baked for 60 minutes at 350).

Frosting Instructions
Blend first four ingredients and add the prunes and nuts; slowly add the confection sugar until the frosting is smooth. Spread on cake when cooled.

Ok, this is my first recipe from the old cookbooks, but it will not be my last.  Beth has loaned these old cookbooks to me for as long as I need, and I plan on reviving a recipe or two off the old pages.

Wednesday, February 5, 2014

Getting to know a Pressure Cooker

My daughter asked me one day if I would help her friend out and tell her what a pressure cooker(PC) is and does.  Apparently she had received a PC as a wedding shower gift, and she was not familiar with it.  And to be honest, other women I have talked to are afraid of using them. Maybe it's the horrible stories of the pressure cookers exploding and badly burning the poor cook who innocently put it on the burner just minutes ago, or maybe it just looks intimidating.  I just purchased my first PC around 5-6 years ago. I consulted the Test Kitchen's recommendations, and they recommended a Fagor Duo-8 quart, stainless steel model, and while it may sound large, you definitely want a larger capacity.  You can only fill it 50% full.

So, how does this contraption work?  Let's use chickpeas as an example: I soak the dried beans for 8-12 hours and then boil them for an hour. With a PC, it's 9-14 minutes(this does not include bringing the water to boil or natural release).  It shaves an incredible amount of time off your cooking.  When I ate poultry, I would buy turkey breasts, throw them in the pressure cooker with tomato juice for ten minutes, and I had turkey breast lunch-meat for the week.  Simply put, the lid you lock into place with a PC, allows water to reach above the normal boiling point of 212°F and reach 250°F. Food cooked in a PC maintains it's flavor and moistness. Your food tastes better, and it takes less time to make it, it's a gotta-have kitchen gadget.


Vegetable Broth made in the PC

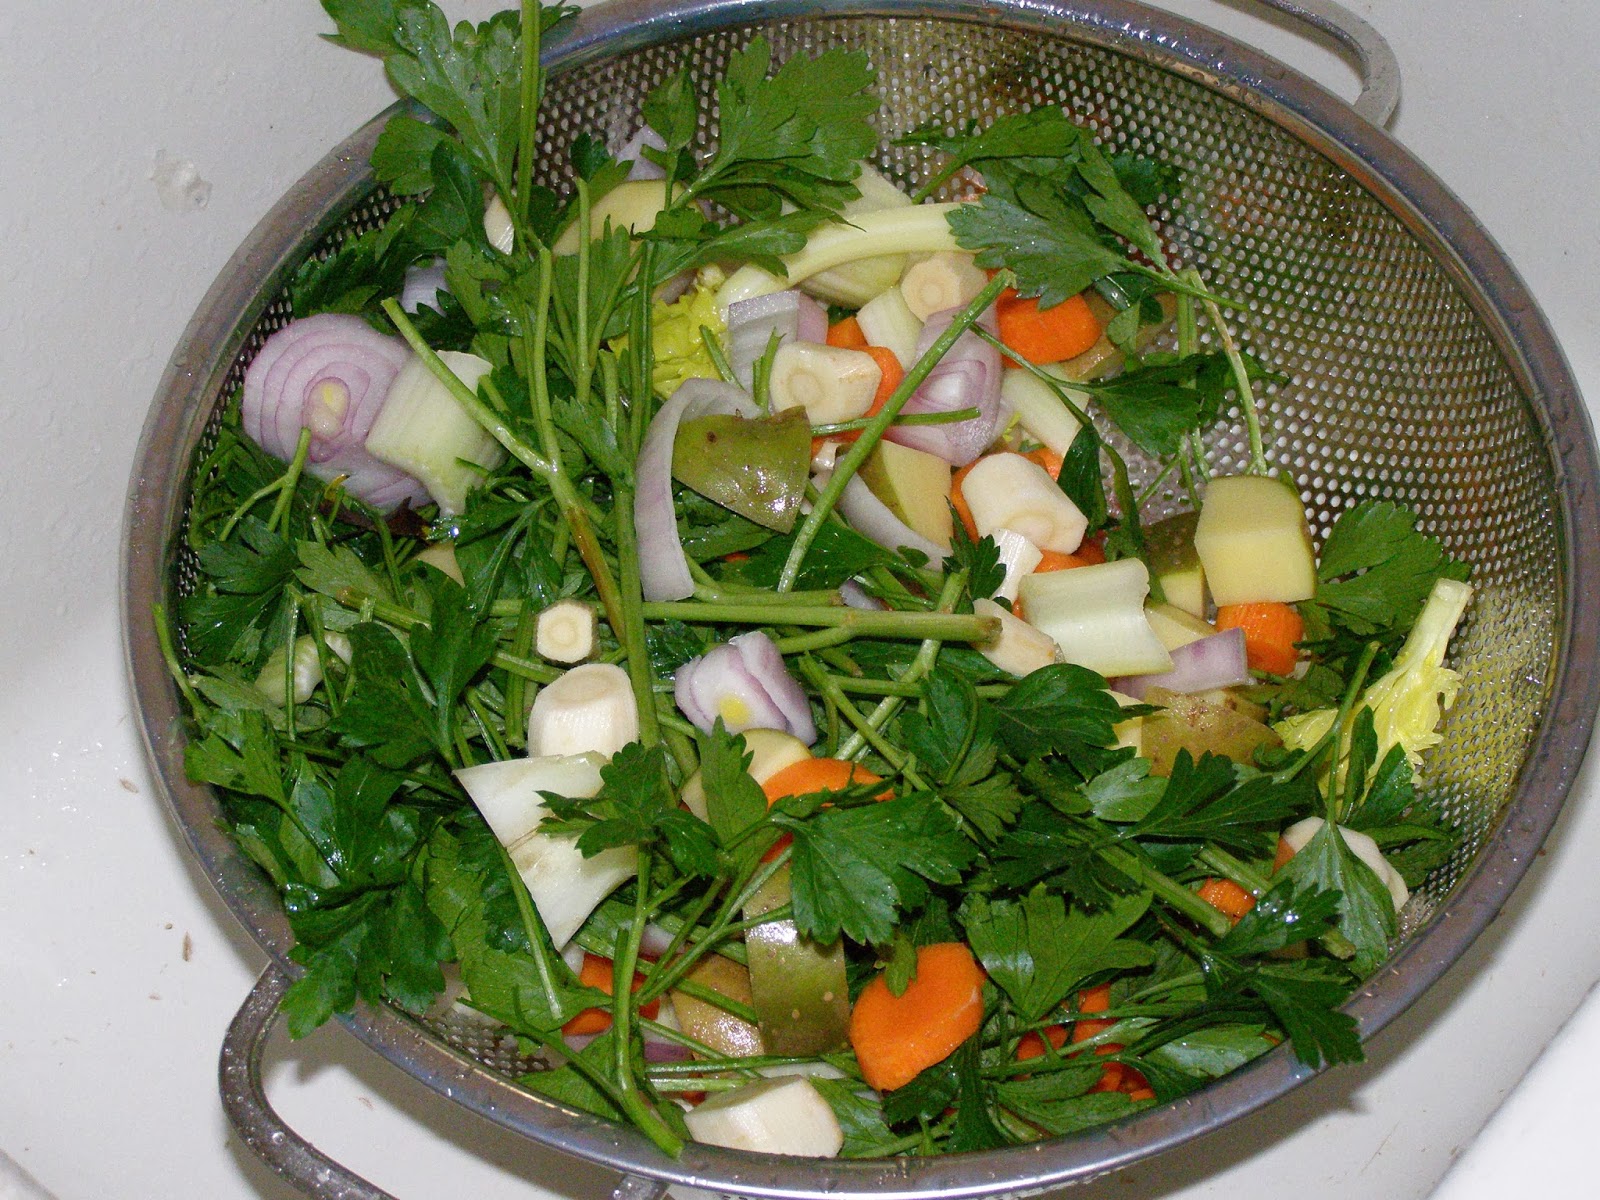
Here is the collection of vegetables I'm using for my broth. There's carrots, red onion, celery, parsnips, potato, and parsley. Five cups of veggies or whatever is ready for broth.  Be sure to clean vegetables thoroughly and then put the vegetables in the PC with a Tbls. of olive oil.  Brown the veggies for 5-6 minutes at medium-high, stirring often.


 Pour in eight cups of filtered water, lock your lid, and turn the heat to high. You have to keep a watchful eye on the PC, watching for the little button, or the technical name, pressure indicator to pop-up.  That means max pressure achieved, so you turn down the heat to a simmer and cook for the recommended time.  In the case of this vegetable broth recipe, we are cooking it for ten minutes. Don't be afraid of the steam escaping and sounding like a loud whistle, it means it's cooking.


After the ten minutes of cooking, turn off the heat and let(the steam)release naturally. This may take a bit of time, but it's my preferred method. Carefully strain the broth over cheese-cloth, squeezing the vegetables with tongs to try to release all of the liquid.

As you can see it yields eight cups of broth.

I let the broth cool completely, and divide the eight cups into four freezer-safe containers.

I gave a little lesson to my daughter's friend about PC's, but I thought I was being most helpful, when I gave her a PC cookbook.  My PC bibles are both by, Lorna Sass, Cooking Under Pressure and Great Vegetarian Cooking Under Pressure.

I hope I've assuaged any fears you have about this wonderful kitchen addition.  The toughest part of a PC is locking the lid.  Other than that challenge, I love it and use it often.