Showing posts with label Vegetarian. Show all posts

Sunday, October 12, 2014

Easy and Quick Homemade Granola Bars

I've blogged about making my own granola bars in the past, but I am always scouting for easier/tastier recipes.  This recipe trumps the recipe I blogged before because it calls for less dried fruit and fewer steps-winner, winner!  Oh, and I love the taste and texture.

This bar goes with me for long days at work or a late morning running errands(who wants to grocery shop hungry?).  It fills me up, but be warned, it can get messy. The plus and yet minus in this case is homemade granola bars don't contain "stuff" to keep the bars glued together.

Trader Joe's peanuts make great peanut butter. I put a half of a bag into the Vita Mix and I blend until it looks like butter. This makes lip smackin' good peanut butter.

The recipe calls for a sauce pan on low heat to heat up the peanut butter and honey--pshaw--I throw it in a microsafe bowl and heat on high for a minute and then stir like a mad woman. Oh, and this isn't honey it's maple syrup.

Chop the nuts, add the oats, puffed rice and dried fruit to a large bowl. The puffed rice adds a really good texture with very few calories.  This may be what sets this bar high on my granola bar list.

Add the peanut butter and honey/syrup with the dry ingredients. Stir until well combined.

Add plastic, foil or parchment to the baking dish so you can just lift out and cut. 

Press the prepared mixture into the baking dish. I've made a double recipe here, so I am using a 13 x 9 dish. Put the mixture in the fridge and let harden for at least an hour.

Cut into bars and wrap each bar into plastic or foil. I keep my bars in a freezer safe bag in the freezer.


 I transport my bar in a cloth snack bag; environmentally friendly and pretty darn cute. Try the bar with an apple--delicious.


Granola Bars


Recipe excerpted word for word from Prevention Magazine, March 2014


Ingredients

1/2 cup honey
1/2 cup any nut butter
1 cup crispy brown rice cereal
1 cup granola or plain rolled oats
1/2 cup chopped nuts
1/2 cup chopped dried cherries or apricots


Directions

Put 1/2 cup honey and 1/2 cup any nut butter in small saucepan over medium heat. Stir until melted together, 2 to 3 minutes. Whisk to combine. Put 1 cup crispy brown rice cereal, 1 cup granola or plain rolled oats, 1/2 cup chopped nuts, and 1/2 cup chopped dried cherries or apricots in large bowl. Add honey mixture and stir well to combine. Lightly grease 8" x 8" baking dish or line with plastic wrap or parchment. Spread mixture evenly in dish, pressing down gently, and cover with plastic wrap. Chill until firm, at least 1 hour. Cut into bars. (For cleaner cutting, transfer to board by lifting edges of plastic wrap or parchment.)

Saturday, October 4, 2014

Who Can Resist Banana Bread?

I can't.

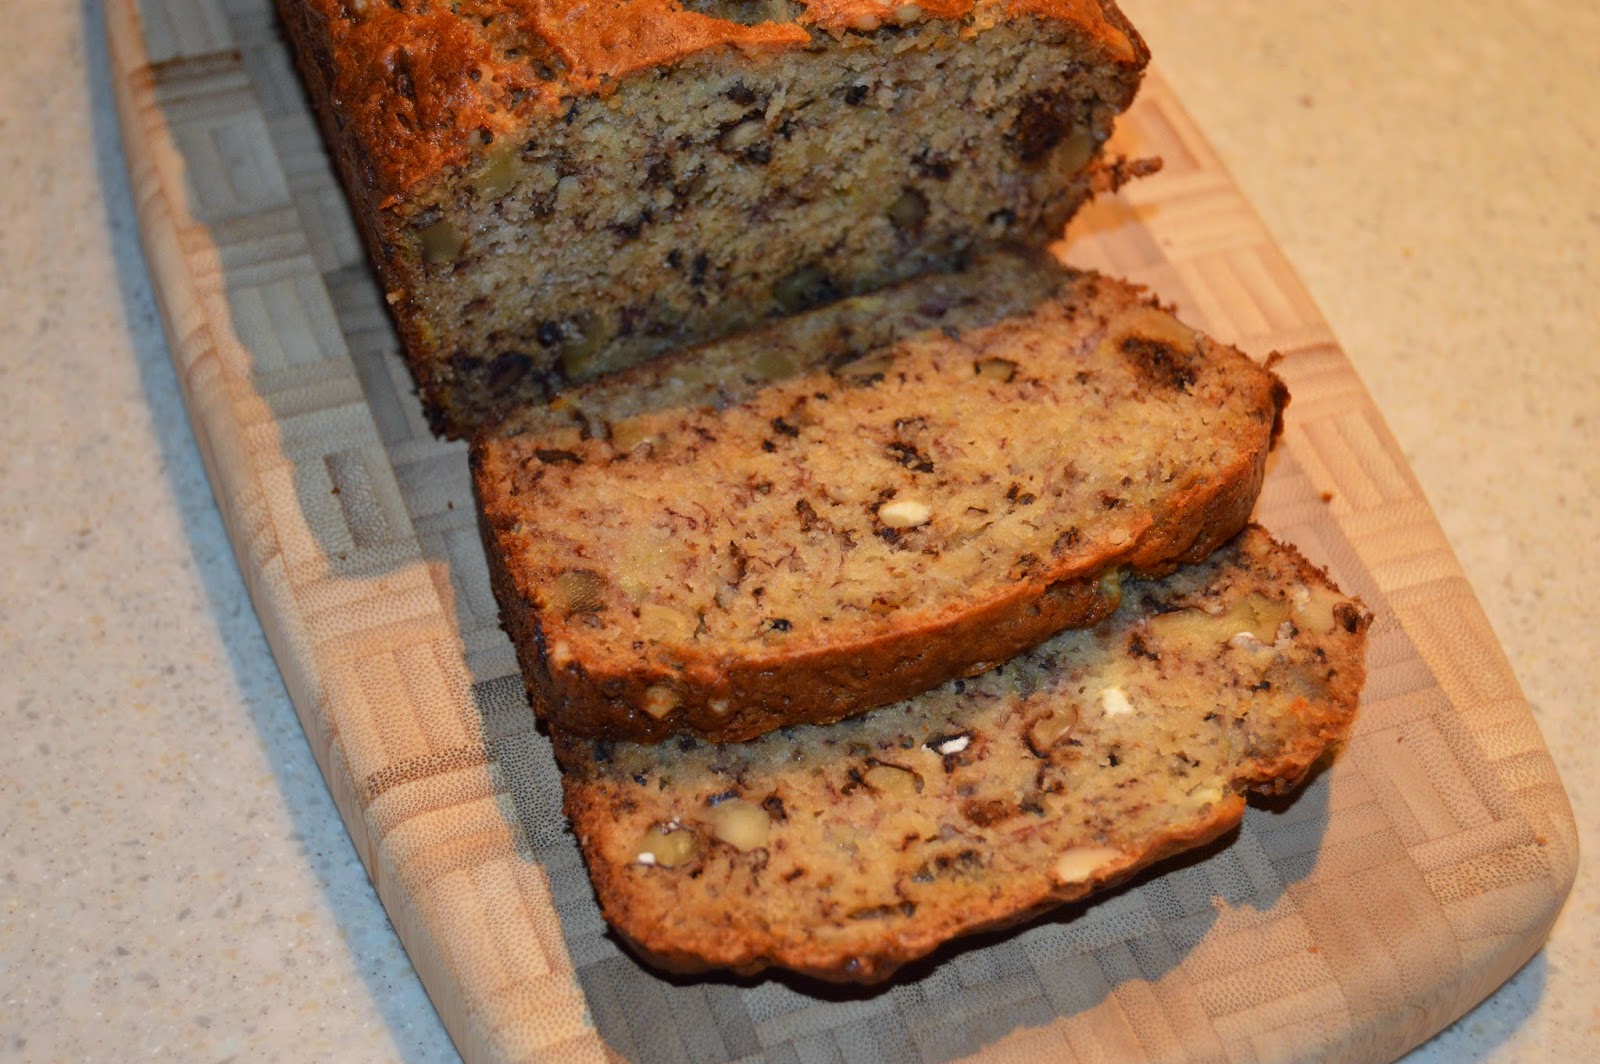
When I spot a few bananas getting past their prime, I instantly start carving out time to make banana bread. It's a treat like no other. Sorry to say I'm a purist who does not put any chocolate in her banana bread; walnuts, yes, but not chocolate.  It's one of the few baked items I make that isn't doused in a deep vat of dark chocolate. This tasty bread doesn't need chocolate-gulp-it's great without it.

The banana bread I've been making for years is from Cook's Illustrated.  It's a great recipe and there is no reason to look for better or change it up at all. Cook's stresses the key to great banana bread is the ripeness of the banana. The riper the better but be sure and bag them to keep the fruit fly population in check. If you don't have the time to bake, bag the bananas and freeze until you do have the time.


 First step is roasting the walnuts.  Add the 1 and a 1/4 cup to a dry pan and roast on medium heat, stirring constantly until you hear popping or smell the oils.  Be careful and don't burn nuts. Let the nuts cool before chopping.


Gather your dry ingredients: sugar, flour, chopped walnuts, baking soda, and salt. Combine all into a large bowl.


Gather your wet ingredients: mashed bananas, melted butter, vanilla, eggs, and yogurt. Combine wet ingredients in a medium bowl and then add to dry. Stir gently until combined and add to prepared bread pan(greased and floured).


Bake for an hour or so until a long toothpick(or I use a spaghetti pasta)comes out clean.

Nom, nom, nom. I ate the heel seconds after taking the photo.


The Best Banana Bread

Excerpted word for word from:Cook's Illustrated

Greasing and flouring only the bottom of a regular loaf pan causes the bread to cling to the sides and rise higher. If using a nonstick loaf pan, on which the sides are very slick, grease and flour sides as well as the bottom.

INGREDIENTS

2 cups unbleached all-purpose flour
3/4 cup granulated sugar
3/4 teaspoon baking soda
1/2 teaspoon table salt
1 1/4 cups toasted walnuts, chopped coarse (about 1 cup)
3 very ripe bananas, soft, darkly speckled, mashed well (about 1 1/2 cups)
1/4 cup plain yogurt
2 large eggs, beaten lightly
6 tablespoons unsalted butter, melted and cooled
1 teaspoon vanilla extract

INSTRUCTIONS

1. Adjust oven rack to lower middle position and heat oven to 350 degrees. Grease bottom only of regular loaf pan, or grease and flour bottom and sides of nonstick 9-by-5-by-3-inch loaf pan; set aside. Combine first five ingredients together in large bowl; set aside.


2. Mix mashed bananas, yogurt, eggs, butter, and vanilla with wooden spoon in medium bowl. Lightly fold banana mixture into dry ingredients with rubber spatula until just combined and batter looks thick and chunky. Scrape batter into prepared loaf pan; bake until loaf is golden brown and toothpick inserted in center comes out clean, about 55 minutes. Cool in pan for 5 minutes, then transfer to wire rack. Serve warm or at room temperature.

Wednesday, January 1, 2014

Fresh Tofu?

I had read about barrels of fresh tofu in a deli...somewhere.  I hadn't been lucky enough to stumble over one in any deli I had happened upon.  Lamenting I did not have access to the delicious blocks of fresh tofu, which this was only imagined since I had never had anything but store-bought, I was determined to end this dilemma. If this fictional deli with the unknown name was not opening in a neighborhood near me, I will make my own!! The motivation to do this DIY project was once again, influenced by, America's Test Kitchen. I must have read the directions a dozen times while I waited for the dried soybeans and nigari to arrive. This was definitely a new frontier for me. I did not grow up in a house where my Mother made tofu on the weekends, nor had I worked in an Asian restaurant and had witnessed it being made. No, no, I had nothing to compare it to and no history to draw from.  I was excited to think I could do this at home and have fresh blocks of tofu.  This is where I confess:  It isn't easy or quick but the results are pretty tasty.

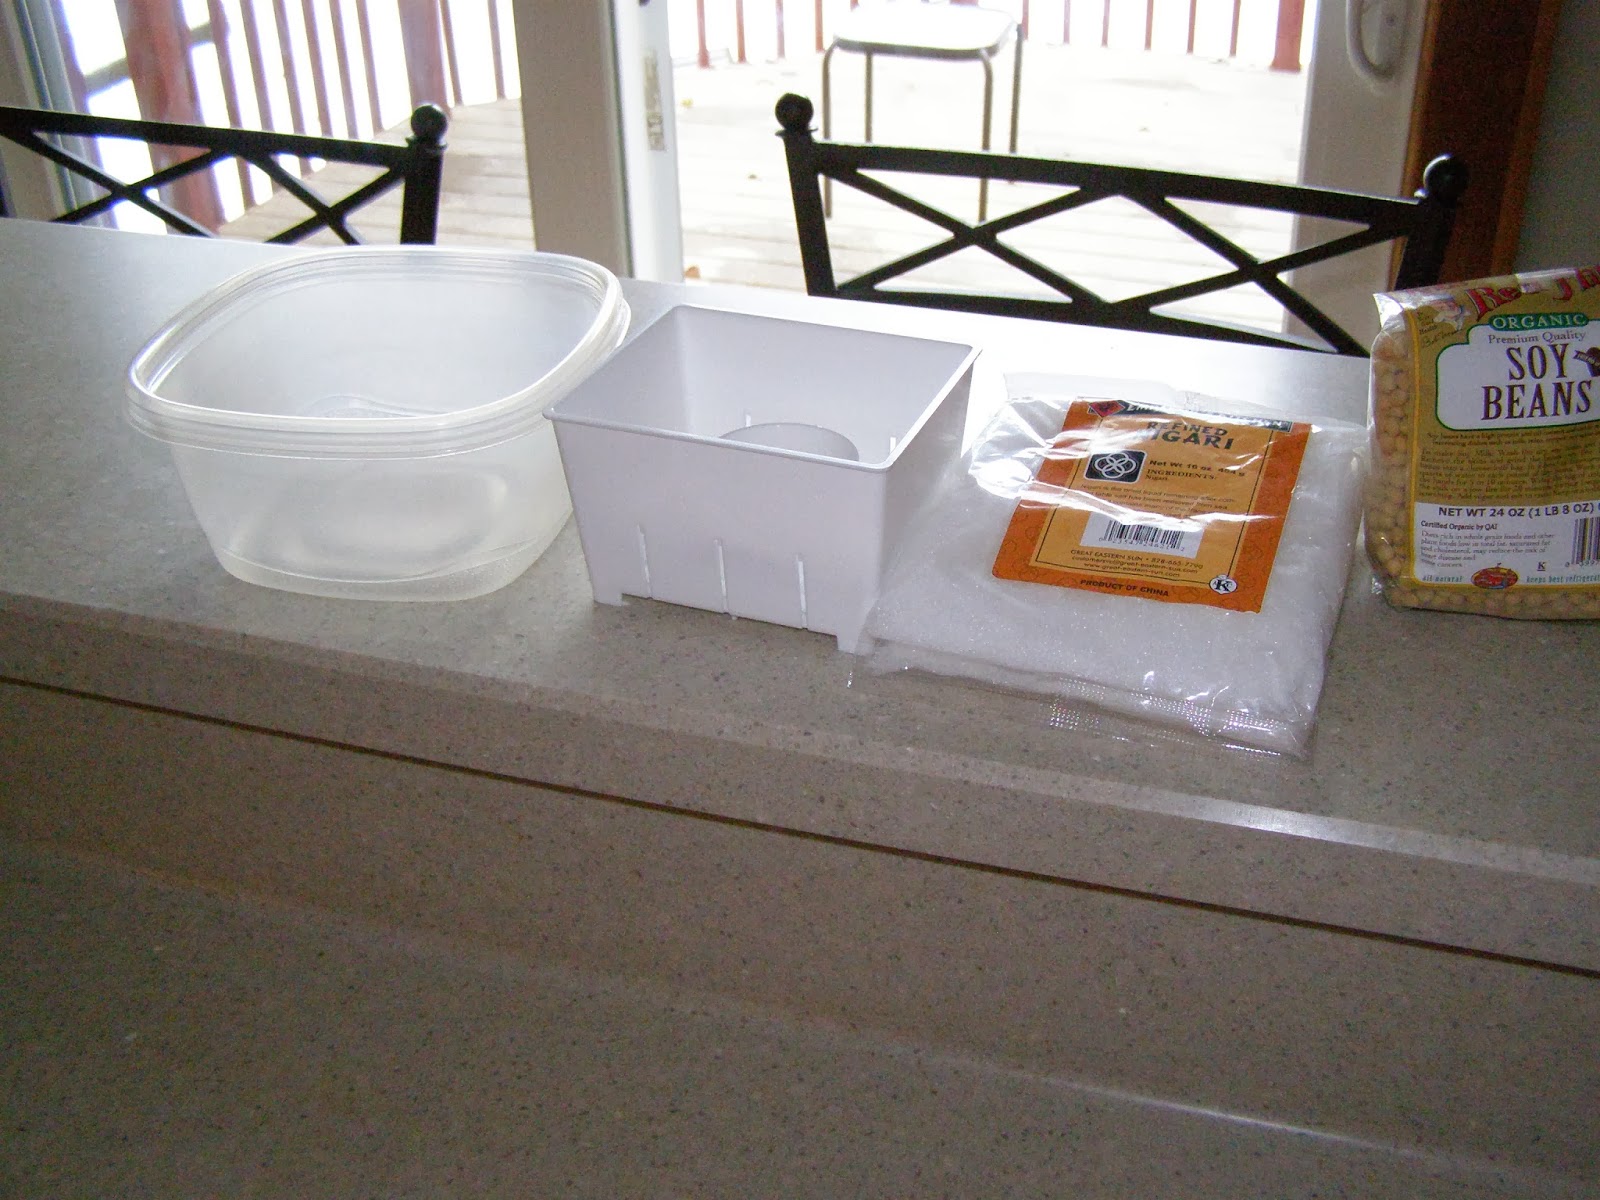
Tools and ingredients: Molds, nigari(a type of salt) and soy beans.  Not pictured but also needed: Cheese-cloth or food- grade muslin. The mold on the left is the plastic container with holes punched out of the bottom and other is a mold I recently purchased.

Start out by soaking 8 ozs beans for 12-18 hours. The beans here have been soaked for 18 hours.


Take 1 cup beans, 3 cups water and process in blender.  Repeat this twice and pour into Dutch oven.
Bring beans and water to a boil over medium-high heat, stirring often.  Once boiling, reduce heat and cook 10 more minutes until slightly thickened.
Prepare a colander with triple layer of food-grade muslin or cheesecloth and place the colander over a bowl or pot. Pour the soy liquid into the muslin.  The cloth will catch the soy curds and the bowl beneath the colander should be smooth, soy milk. Gather up the ends of the muslin and squeeze out the excess liquid.  Put the curds aside for another use(I feed it to chickens, but I am guessing there are other uses). Pour the liquid back into a clean dutch oven and bring back to a boil on medium-high heat. Remove from heat and add a 1/4 Cup of the diluted nigari while stirring. Let rest for two minutes, covered.  Uncover dutch oven and add remaining nigari. Wait 20 minutes, undisturbed.


Gently scoop out the curd and place in a cheese-cloth lined mold.
Cover curds with extra cheese-cloth and weight it with a two-lb anything. Keep the weight on until desired firmness.
The finished product.  It ended up in a curry stew.


Taken from America's Test Kitchen DIY

Tofu
8 ounces(1 1/4 cups)dried soybeans, picked over and rinsed
9 1/2 cups water, plus extra for soaking beans
2 teaspoons liquid nigari

1. Place beans in large bowl or container and add enough water to cover by 2 inches. Soak until beans are pale yellow and split apart when rubbed between fingertips, 12 to 18 hours.

2. Drain and rinse beans(you should have about 3 cups beans). Working in batches, process 1 cup soaked soybeans and 3 cups water in blender until mostly smooth, about 3 minutes. Transfer mixture to Dutch oven and repeat twice more with remaining 2 cups soybeans and 6 cups water.

3. Line colander with butter muslin or triple layer of cheesecloth and set over large bowl. Bring soy milk mixture to boil over medium-high heat, stirring frequently with rubber spatula to prevent scorching and boiling over. Reduce heat to medium-low and simmer, stirring frequently, until slightly thickened, about 10 minutes.

4. Pour soybean mixture into prepared colander to strain. Being careful of hot soy milk, pull edges of muslin together to form pouch, and twist edges of muslin together. Using tongs, firmly squeeze soybean pulp to extract as much liquid as possible. You should have about 8 cups of soy milk; discard soybean pulp or reserve for other use. Transfer soy milk back to clean Dutch oven and bring to boil over medium-high heat, stirring occasionally to prevent scorching. Remove pot from heat. Combine remaining 1/2 cup water and nigari in measuring cup.

5. Begin stirring soy milk in fast, figure-eight motion with rubber spatula. fast, about 6 stirs. While still stirring, add 1/4 cup prepared nigari mixture. Stop stirring and wait until soy milk stops moving. Cover pot and let sit undisturbed for 2 minutes. Uncover, sprinkle remaining 1/4 cup nigari mixture on surface of milk, and gently stir using figure-eight motion, about 6 stirs. Cover pot and let sit undisturbed until curds form and why is pooling on top and around sides of pot, about 20 minutes.

6. Line tofu mold with butter muslin or triple layer of cheesecloth and place in colander set over large bowl or sink. Using skimmer or large slotted spoon, gently transfer soy milk curds to prepared mold, trying not to break up too much of their natural structure. Cover top of curds with excess muslin and place top of press in place. Weight with 2-pound weight. Press tofu until desired firmness is reached: 20 minutes for soft; 30 minutes for medium; 40 to 50 minutes for firm. Gently remove tofu from mold and place in pie plate or baking dish. Fill with cold water to cover and let sit until tofu is slightly firmer, about 10 minutes. Tofu can be refrigerated in airtight container filled with water for up to 1 week; change water daily.

Notes:  I had a tough time finding liquid nigari, so I bought flakes. Here is a link to Nigari. I add two teaspoons flakes to the 1/2 cup of water and stir until dissolved..

These are the beans I ordered, Bob's Red Mill Organic Soy Beans; one bag will make 3 squares of tofu.

Don't worry if you don't have a mold, I fashioned one a plastic container with holes punched out of the bottom.